


Royalty NFT

Metaverse


All Services
OTHER
COMING SOON
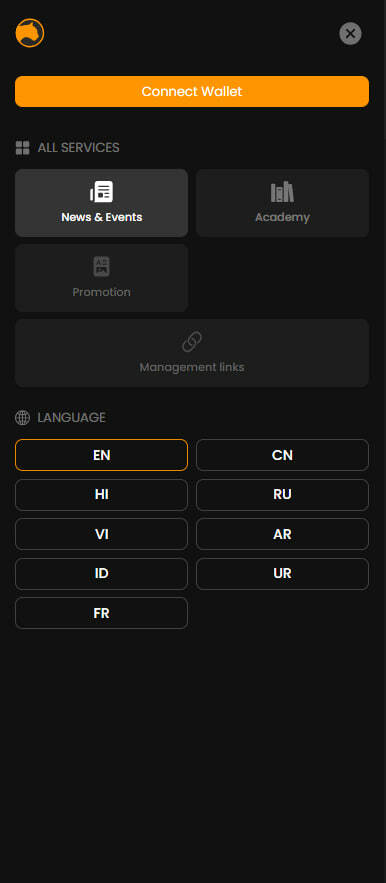
Management links
COMING SOON


Promotion


ALL SERVICES
LANGUAGE


Тема


HOLIDEX
- What You Need to Start Trading
- Steps to Use HoliDEX
- Setting Up Your Wallet
- Add Holichain and USDT Tokens to Your Wallet
- Connecting Your Wallet to HoliDEX
- Setting Up the Swap Process
- Selecting Tokens for Swap
- Liquidity Pools
- Requirements for Adding Liquidity
- Available Features in the "Pools" Tab
- How to Add Liquidity to a Pool
- Withdrawing Earned Fees
- Adding Liquidity
- Removing Liquidity
HoliDEX is a decentralized cryptocurrency exchange that allows users to trade cryptocurrencies without intermediaries like centralized exchanges and platforms. It employs an automated market maker (AMM) mechanism, which facilitates trading through liquidity pools.
What You Need to Start Trading:
- Cryptocurrency Wallet: Most Web3 wallets, such as MetaMask and TrustWallet, are supported.
- Internet Access and Browser: A compatible browser, such as Chrome or Firefox, with the wallet extension installed.
- A Sufficient Amount of POL Tokens on the POL Blockchain*
Steps to Use HoliDEX
- Setting Up Your Wallet
- Install and configure your wallet: For example, use MetaMask.
- Add the POL network: POL is pre-configured by default in MetaMask.
- Fund your wallet with POL tokens: POL is needed to pay transaction fees on the blockchain. You can find instructions on how to top up your wallet and purchase cryptocurrency in this guide.
- Add USDT to your wallet: This will allow you to purchase Holichain (HC).
2. Add Holichain and USDT Tokens to Your Wallet
Navigate to the "Import Token" function in your wallet settings.
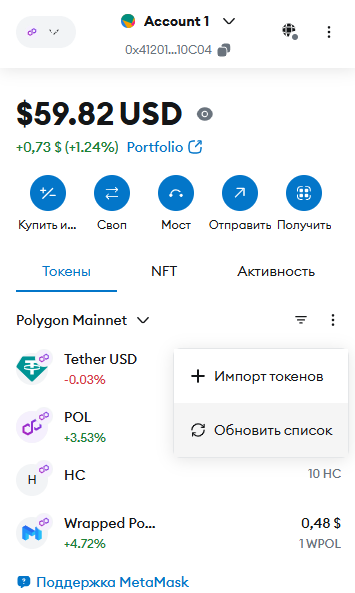
Go to the "Custom Token" tab and add the Holichain (HC) smart contract address — 0x762d3D096B9A74f4d3Adf2b0824456Ef8FCe5DaA
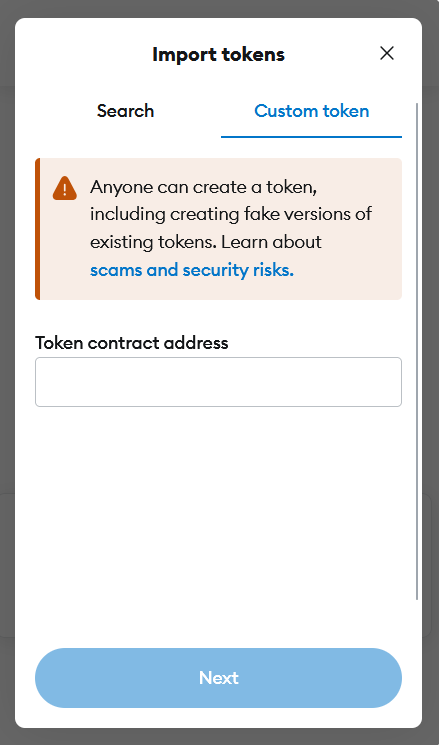
- All necessary data will populate automatically. Click "Next," then "Import."
- The HC token will now be displayed in your wallet.
3. Connecting Your Wallet to HoliDEX
1. Go to HoliDEX: https://dex.holiverse.ai/.
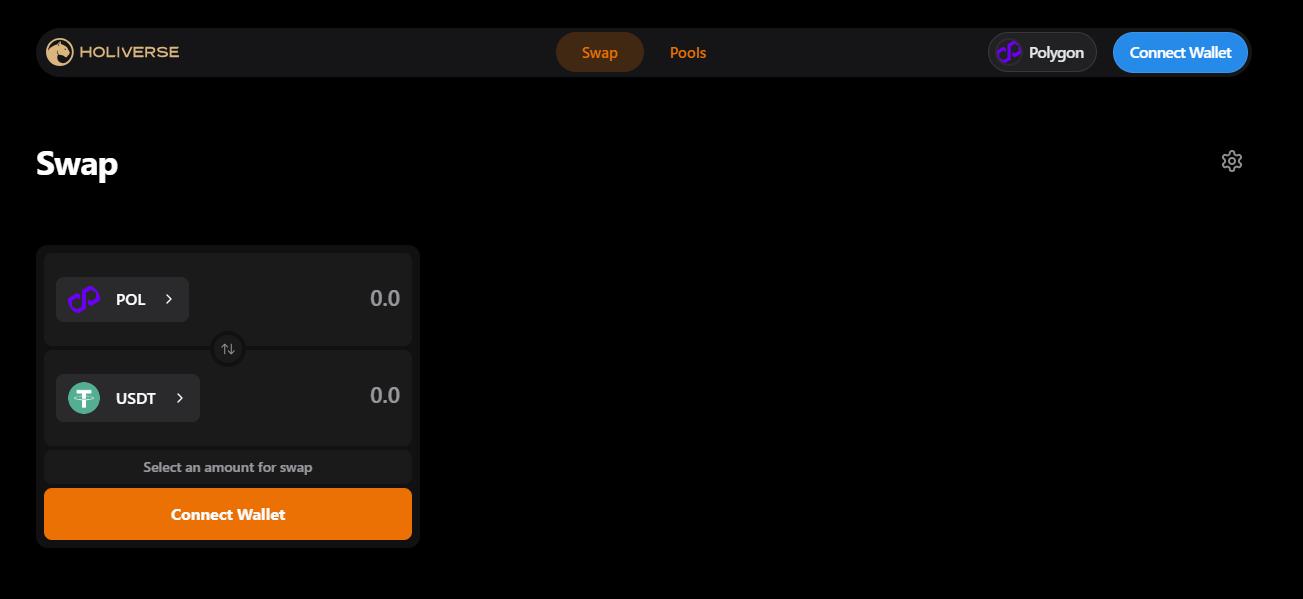
2. Click the "Connect Wallet" button in the top-right or bottom-left corner of the page.
2. Click the "Connect Wallet" button in the top-right or bottom-left corner of the page.
3. Select your wallet from the pop-up list, for example, MetaMask.
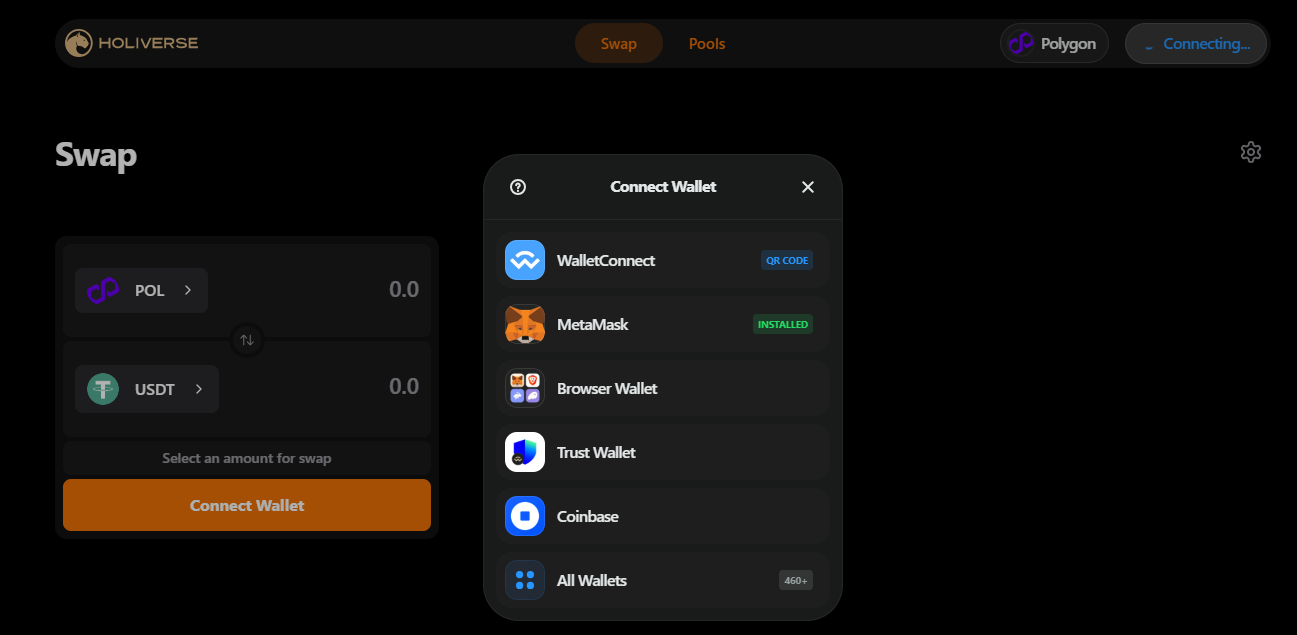
4. Confirm the connection to the HoliDEX exchange in your wallet.
Setting Up the Swap Process
The Swap mechanism on HoliDEX is customizable to meet various user needs.
In the "Swap" tab, click on the gear icon located in the top-right corner of the page.
This will open options for configuring slippage tolerance, multi-hop functionality, and expert mode.
In the "Swap" tab, click on the gear icon located in the top-right corner of the page.
This will open options for configuring slippage tolerance, multi-hop functionality, and expert mode.
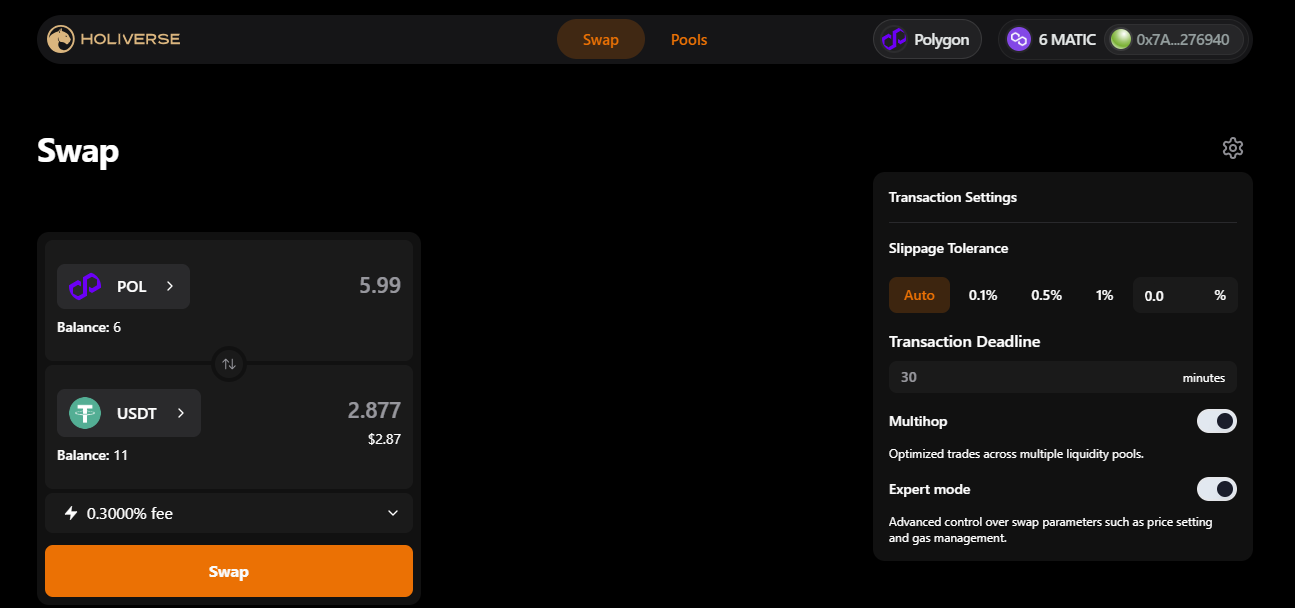
1. Slippage Tolerance. Due to the nature of decentralized exchanges, users may encounter price differences during the swap process. Selecting a slippage level (in percentage) means the user chooses the level of risk within which the swap can occur.
For example, by selecting 1%, the user agrees that the exchange rate may change by no more than 1%. Selecting "Auto" allows the level of losses to increase based on market conditions determined automatically. Transaction execution time may increase with a lower percentage and decrease with "Auto."
2. Transaction Deadline. You can also set a time limit for your transaction to be executed. Due to user-defined transaction settings, there may be situations where the operation cannot be completed under the specified criteria. In this case, you can set a timer within which the transaction will either execute when conditions are met or be canceled after the time expires.
For example, if a user sets a slippage tolerance of 0.1% and the system cannot complete the swap at the current time, the user can set a transaction deadline, such as 60 minutes. This means the transaction will execute within this time frame if the conditions are met or will be canceled when the timer ends.
3. Multihop. This option allows users to consent to finding exchange routes for an asset from other liquidity pools. The waiting time and fees may increase in this case. However, this function enables finding the most favorable exchange rates.
4. Expert Mode. This mode is designed for experienced DEX traders who need manual configuration of transaction parameters on the POL blockchain. This option is risky for beginners due to the potential for transaction failure or loss.
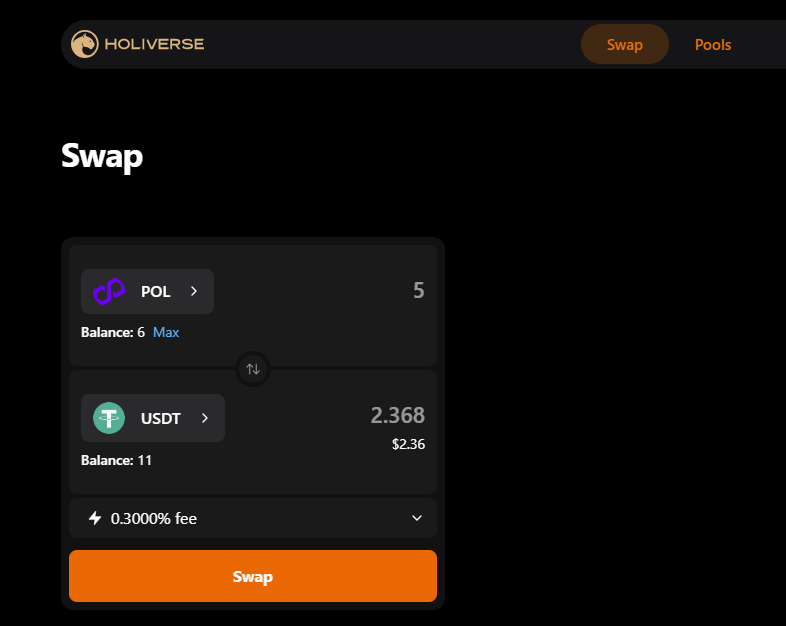
Selecting Tokens for Swap
1. On the main interface page, select the "Swap" tab next to "Pool".
2. In the top field of the opened "Swap" window, select the token you want to exchange, for example, POL.
3. In the bottom field, select the token you want to receive in exchange, for example, USDT.
4. Your current available token balance is displayed below the token names. To the right of the token names, you can enter the desired amount to exchange.
3. In the bottom field, select the token you want to receive in exchange, for example, USDT.
4. Your current available token balance is displayed below the token names. To the right of the token names, you can enter the desired amount to exchange.

5. Enter the amount of tokens you want to exchange or receive. If you input a number in one field, the amount in the other field will be automatically recalculated based on the current exchange rate.
Note: The displayed price calculation at this stage is approximate and provided for informational purposes only.
6. You can open the "Fee" tab located at the bottom of the token selection window to view the operation details.
Note: The displayed price calculation at this stage is approximate and provided for informational purposes only.
6. You can open the "Fee" tab located at the bottom of the token selection window to view the operation details.
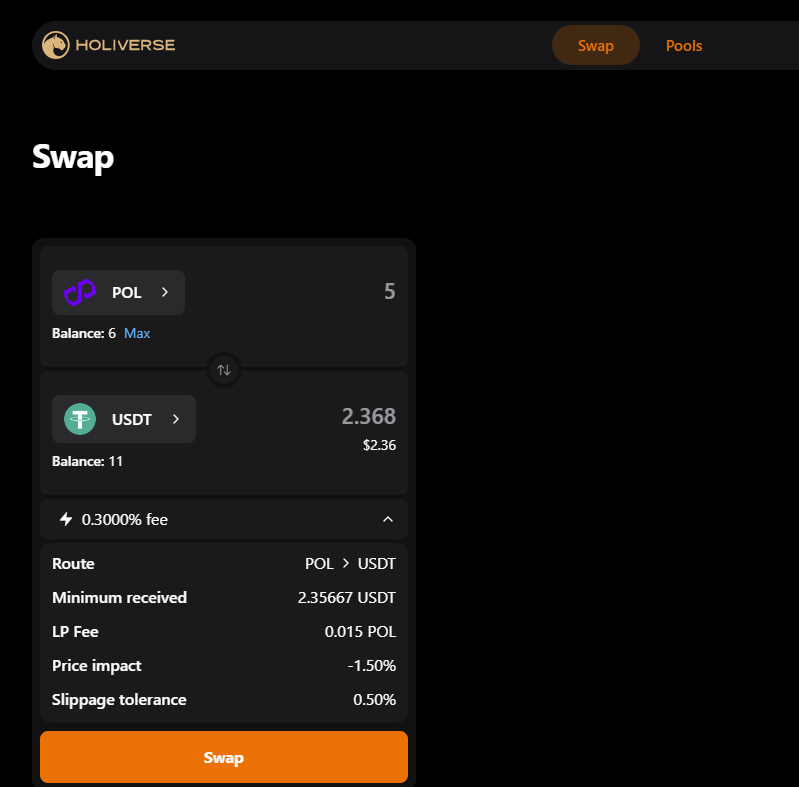
7. Adjust the swap conditions if necessary using the options to change slippage tolerance, multihop, transaction deadline, and expert mode, as described in Section 3 — "Setting Up the Swap Process."
8. Click "Swap."
8. Click "Swap."
Selecting Tokens for Swap
1. If you are using a token for the first time on HoliDEX, such as exchanging USDT for HC, your wallet may require you to approve the use of this token — Approve*. This action must be confirmed in your wallet before completing the swap.
Remember: Every action on HoliDEX is performed using blockchain technology. Each operation can only be executed with your approval and can be verified at any time on the POL blockchain.
2. After granting approval (Approve), click "Swap."
3. Ensure that the fee and transaction terms are acceptable to you, as all blockchain transactions are irreversible.
4. Confirm the transaction in your wallet. Just like with the Approve step, you will need to validate your action.
3. Ensure that the fee and transaction terms are acceptable to you, as all blockchain transactions are irreversible.
4. Confirm the transaction in your wallet. Just like with the Approve step, you will need to validate your action.
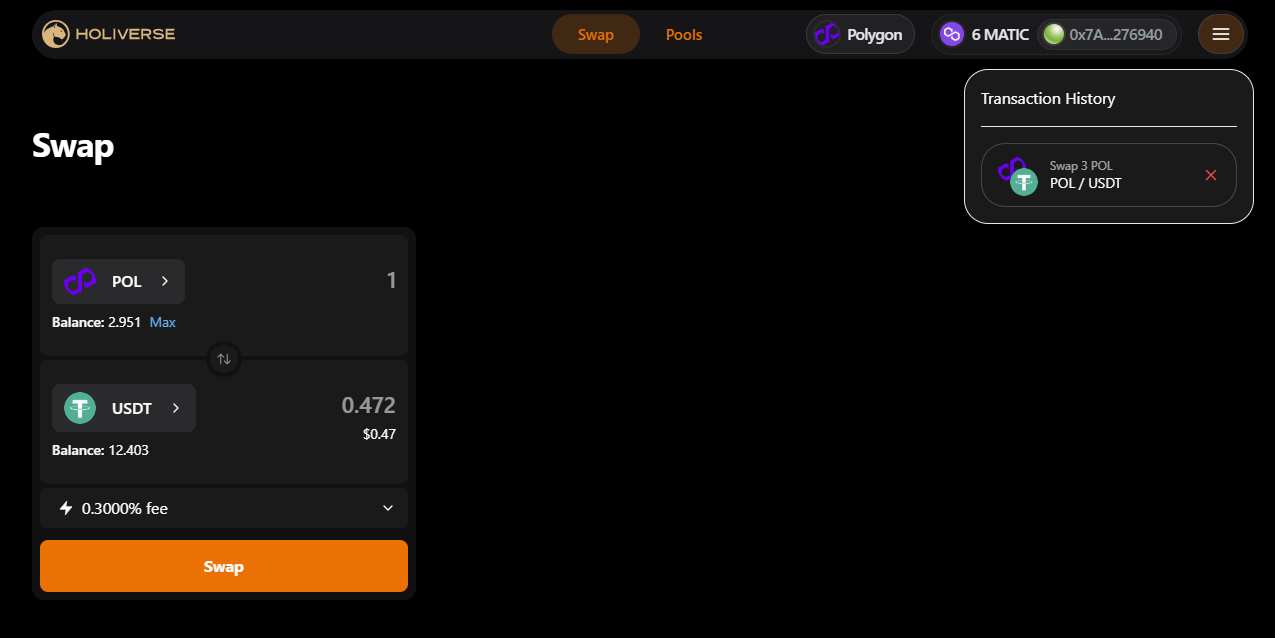
Transaction Completion
- If all conditions for the swap align with market conditions, the transaction will be executed. This typically takes no more than a minute; however, depending on market activity and blockchain conditions, the processing time may be longer.
- You can check the status of your transaction at any time using specialized blockchain explorers, such as Polygonscan (https://polygonscan.com).
- After your first successful transaction, a transaction history will appear in the top-right corner next to your blockchain address on HoliDEX, allowing you to review your recent activity on the exchange.
Liquidity Pools
The automated market maker (AMM) mechanism allows any user on HoliDEX to earn passive income by providing liquidity to the platform.
Liquidity pools are specialized smart contracts used for exchanging crypto assets on decentralized exchanges. One group of users supplies liquidity for the exchange and, in return, earns a share of the fees generated from swaps. Another group of users utilizes the liquidity pool to exchange crypto assets (Swap), paying a small fee for each transaction—this fee generates passive income for the liquidity providers.
A liquidity pool typically consists of two crypto assets, such as POL and USDT. To add liquidity to a pool on HoliDEX, you will need at least two different assets. For example, to add liquidity to the POL/USDT pool, you must supply an amount of POL and USDT equivalent to their market value.
Liquidity pool technology comes with a risk known as Impermanent Loss. This occurs when the value of the tokens you deposit in the pool changes over time. The greater the price fluctuation, the higher the potential impermanent loss. This risk represents a possible numerical loss compared to the initial deposit when withdrawing funds. However, passive income from transaction fees can help offset this risk.
Requirements for Adding Liquidity
- Cryptocurrency Wallet: Most Web3 wallets, such as MetaMask and TrustWallet, are supported.
- Internet Access and Browser: A compatible browser, such as Chrome or Firefox, with the wallet extension installed.
- A sufficient amount of POL tokens on the POL blockchain*.
- Tokens for the respective pool: You need to have tokens for the liquidity pool in equal proportions, based on current market conditions.
POL is the native coin of the POL blockchain. It is required for transactions, as every operation on HoliDEX is conducted on the POL blockchain.
Available Features in the "Pools" Tab
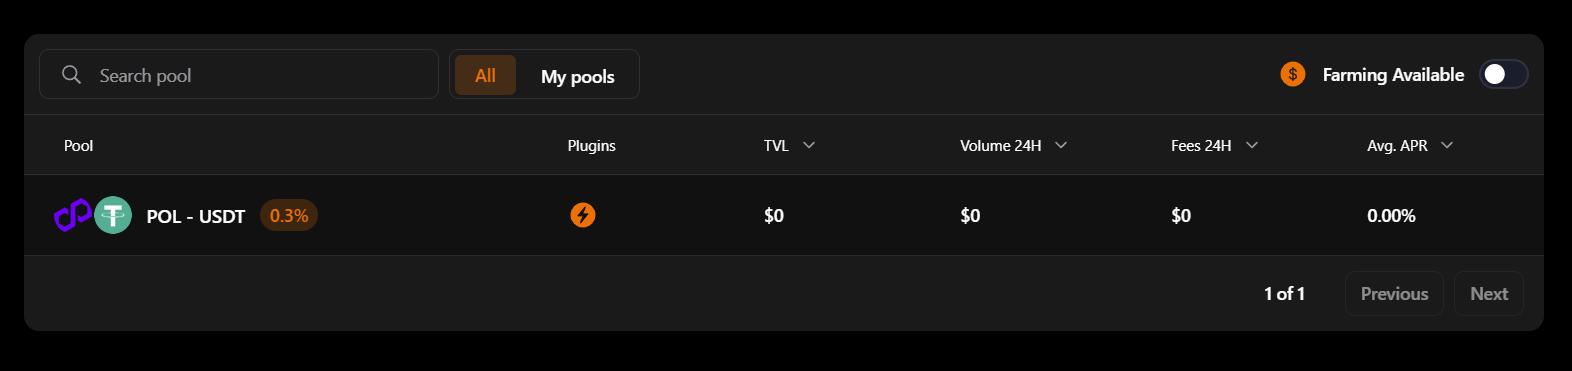
- Search Function: Users can enter the name of a token to quickly find the desired pool.
- Tabs "All" and "My Pools". "All": Displays all available pools. "My Pools": Shows only the pools where you have an open position.
- "Farming Available" Button: Filters pools to show only those with farming functionality.
Farming: The process of earning tokens as passive income for providing liquidity on decentralized exchanges. Farming is a form of passive income on HoliDEX, where instead of earning a share of trading fees in the pool, users receive rewards in a pre-determined asset.
4. The "Pools" section displays the pool names and the tokens included in each pool.
5. TVL (Total Value Locked): Displays the total value of user deposits in a specific pool, shown in USD.
6. APR (Annual Percentage Rate): A projected estimate of the yearly rewards users can earn from providing liquidity to the pool. This is not a guaranteed figure, as APR is constantly adjusted and may differ from actual results.
7. "Plugins": Shows additional pool characteristics, including fee mechanisms and farming availability.
8. Volume and Fees: Displays the trading volumes and collected fees over the past 24 hours.
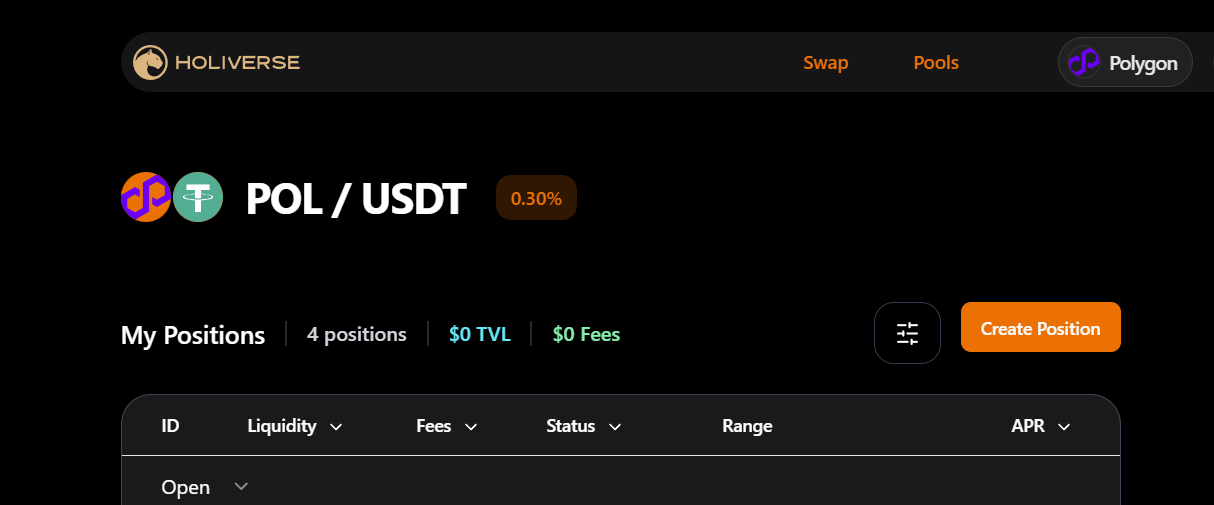
How to Add Liquidity to a Pool
- Go to the "Pools" tab located to the right of "Swap".
- Select the liquidity pool where you plan to add tokens and click on it.
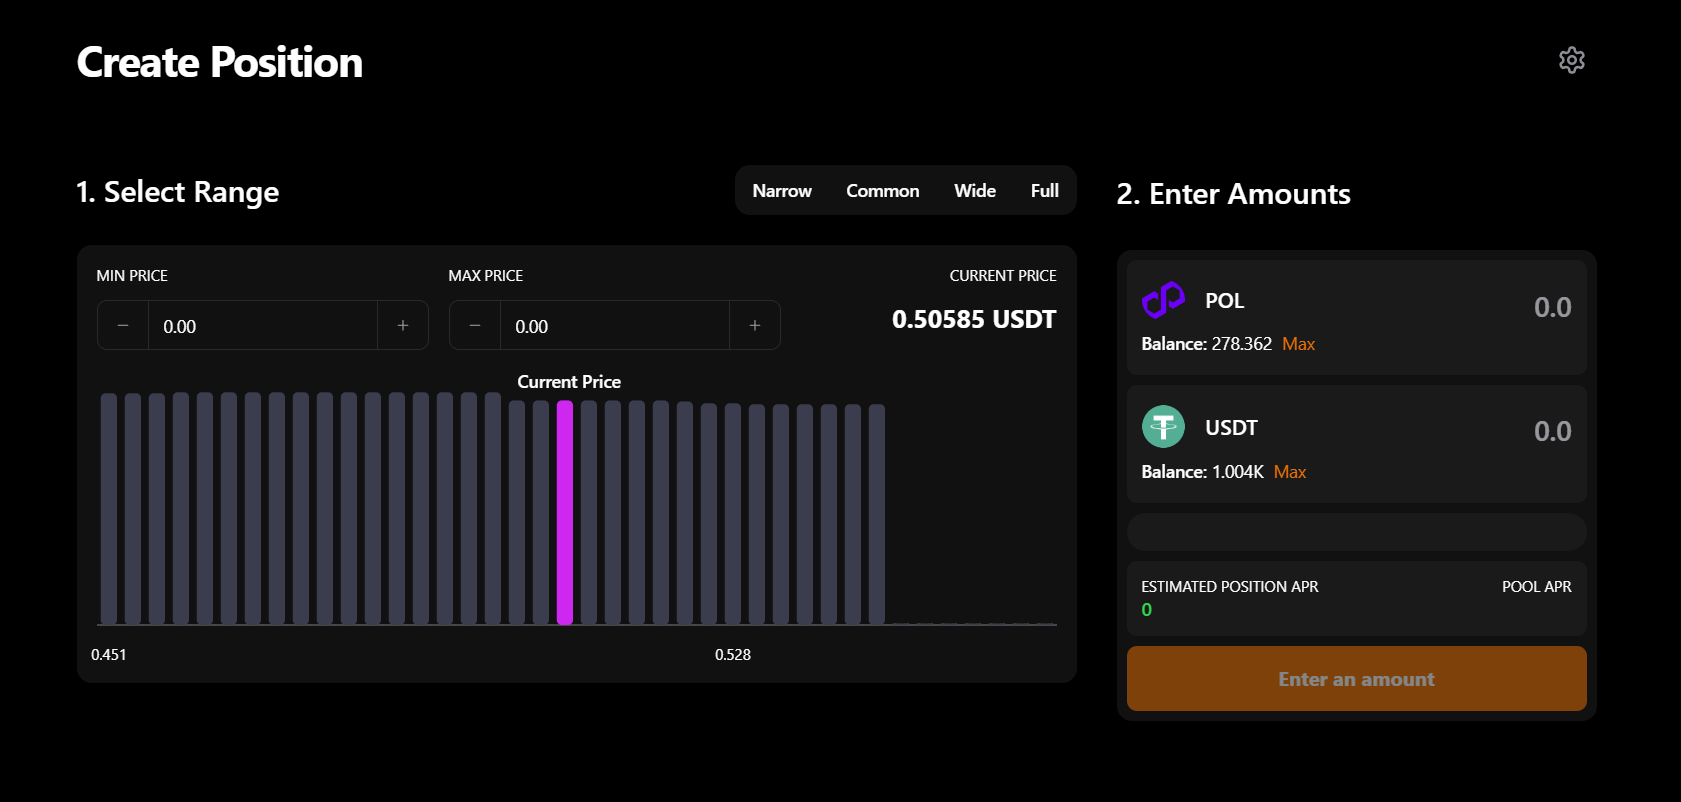
- If you don’t have any crypto assets in the pool, you will be prompted to create a position. Click the "Create Position" button.
At the next step, the user needs to determine the conditions for opening their position by selecting the price range in which they would like to provide their tokens.
Since HoliDEX meets the highest standards, the exchange includes mechanisms for dynamically adjusting fees for liquidity providers. This feature allows users to choose the price corridor in which they want to allocate their funds. The narrower the price range, the higher the potential yield — APR.
By default, there are four ranges: Narrow, Common, Wide, and Full. Narrow — price range from -2% to +3%. Common — range from -3% to +6%. Wide — range from -7% to +11%. Full — range for any price fluctuation. Manual range adjustment is also available. The most profitable option is Narrow. The least profitable is Full.
For most users, it is recommended to use Full, as the other options require experience and technical knowledge. While they may potentially yield higher APR, these options are also riskier for beginners.
4. In the "Select Range" tab, choose the price range where you plan to provide liquidity.
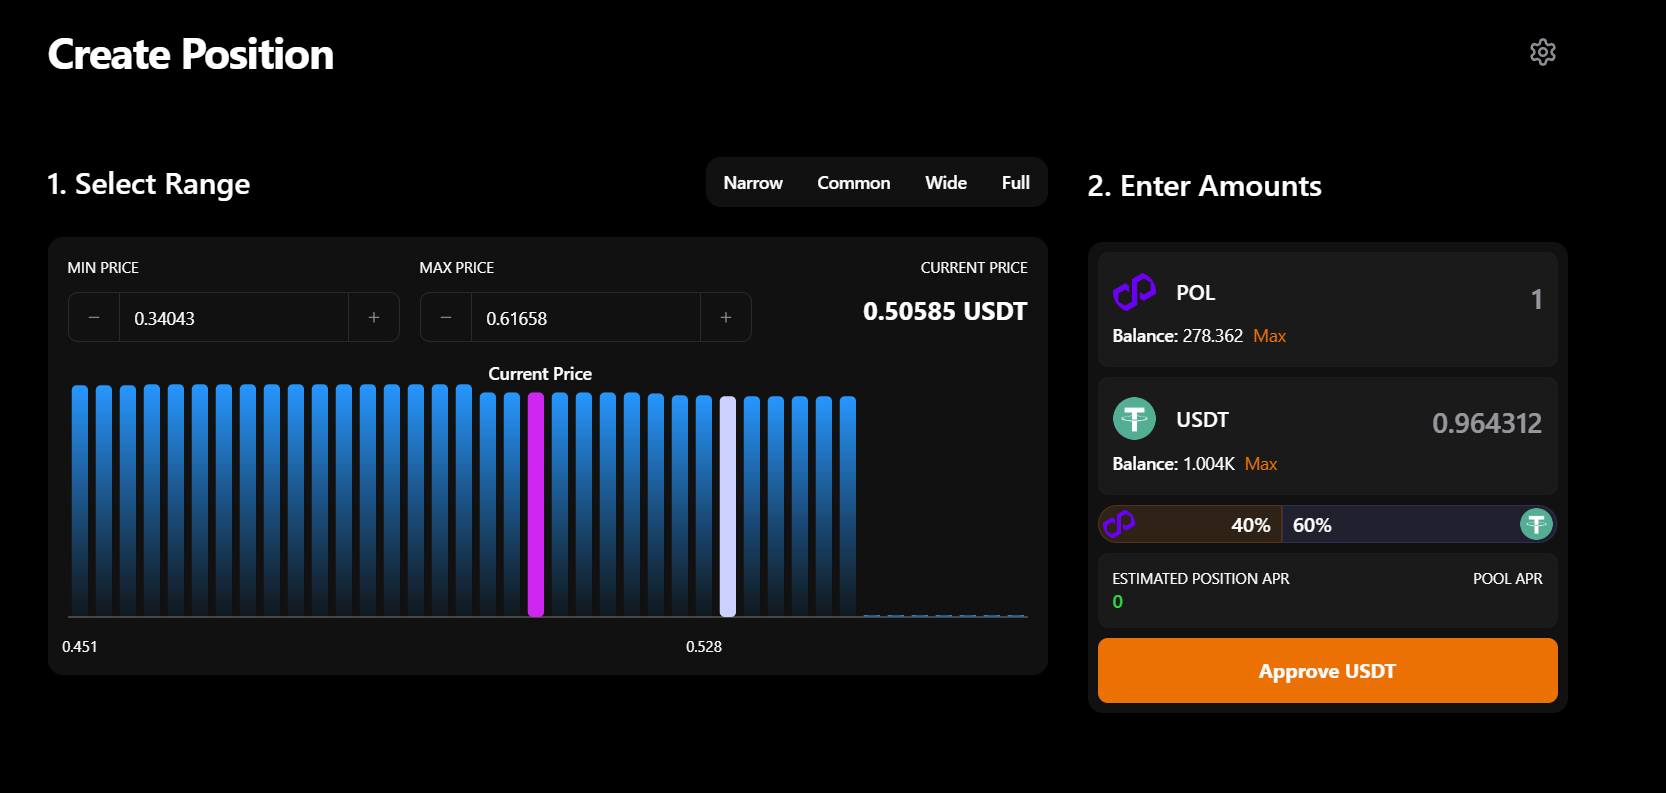
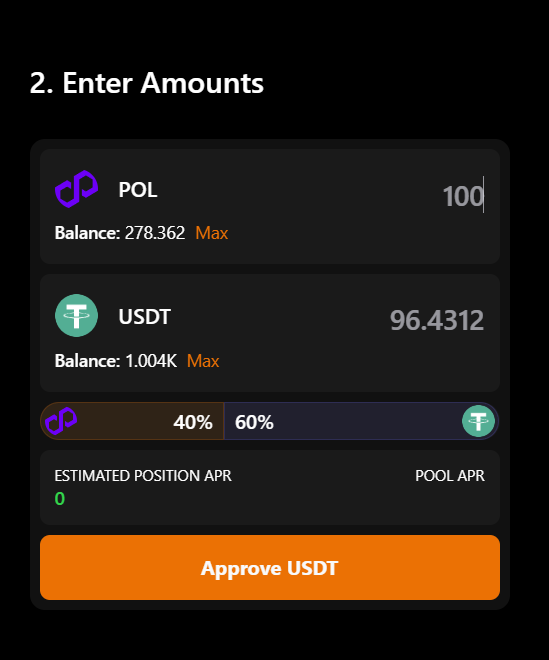
5. In the "Enter Amounts" tab, specify the number of tokens. The system will automatically calculate the required token ratio needed to create the position, based on the selected price range.
6. Double-check the accuracy of all entered data.
7. Before clicking the Approve button, you can also adjust transaction settings, such as slippage tolerance or expert mode.
8. Click Approve to allow the exchange to use the selected tokens.
7. Before clicking the Approve button, you can also adjust transaction settings, such as slippage tolerance or expert mode.
8. Click Approve to allow the exchange to use the selected tokens.
9. You will then need to approve the operation on the blockchain via your Web3 wallet.
10. Once the Approve step is complete, the "Create Position" button will become available. Recheck all conditions, then click it.
10. Once the Approve step is complete, the "Create Position" button will become available. Recheck all conditions, then click it.
11. Finally, approve the transaction on the blockchain through your Web3 wallet.
12. If all conditions for the exchange align with market conditions, the transaction will be executed. This usually takes no more than a minute, but the time may vary depending on market activity and blockchain conditions.
13. You can check the status of your transaction at any time using specialized blockchain explorers, such as Polygonscan (https://polygonscan.com).
14. Once completed, you will receive liquidity pool tokens (LP tokens) representing your share in the pool. These are special ERC-721 standard tokens that cannot be forged or altered. They serve as a certificate, granting the holder the right to claim their share of tokens from the pool at any time.
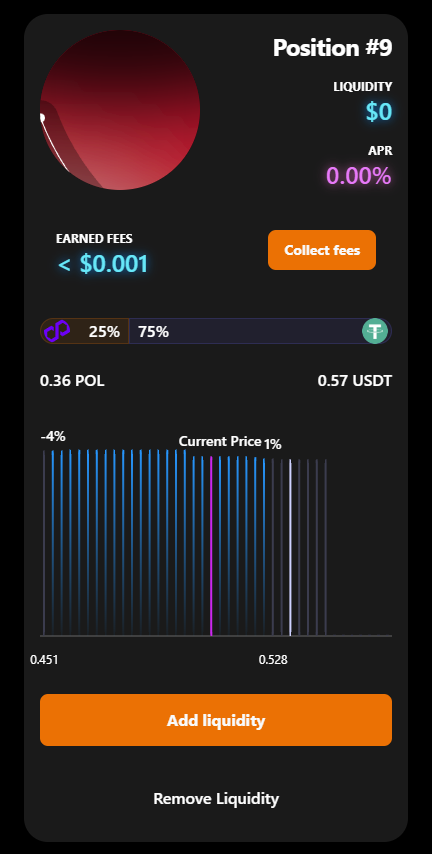
15. Now, when selecting the pool, a tab will appear showing your open and closed positions. For each position in the pool, three additional functions will also be available: Collect fees, Add liquidity to the pool, Remove liquidity from the pool.
Due to the price range settings, some positions may have the status "Out of range", which means that the position is inactive at the current pool prices and does not generate passive income.
The "In range" status indicates that your liquidity is actively being utilized in the pool under current market conditions and will generate passive income.
12. If all conditions for the exchange align with market conditions, the transaction will be executed. This usually takes no more than a minute, but the time may vary depending on market activity and blockchain conditions.
13. You can check the status of your transaction at any time using specialized blockchain explorers, such as Polygonscan (https://polygonscan.com).
14. Once completed, you will receive liquidity pool tokens (LP tokens) representing your share in the pool. These are special ERC-721 standard tokens that cannot be forged or altered. They serve as a certificate, granting the holder the right to claim their share of tokens from the pool at any time.
15. Now, when selecting the pool, a tab will appear showing your open and closed positions. For each position in the pool, three additional functions will also be available: Collect fees, Add liquidity to the pool, Remove liquidity from the pool.
Due to the price range settings, some positions may have the status "Out of range", which means that the position is inactive at the current pool prices and does not generate passive income.
The "In range" status indicates that your liquidity is actively being utilized in the pool under current market conditions and will generate passive income.

Important: Liquidity can only be added to the same position within the previously selected price range. If you chose Full, all new liquidity will be added within this range. To select a different range, you must open a new position, even if it is in the same pool. The number of positions is unlimited—users can choose various options to optimize their trading strategy.
Withdrawing Earned Fees
1. Select "My Pools" next to the search bar and click on the pool where you previously provided liquidity.
2. A new window will open, displaying all your positions in this pool. You may have multiple positions if you locked liquidity in different price ranges. The numerical label on the left of each position with a # indicates your reference number in the pool—it does not affect functionality.
3. You can also filter positions by open, closed, or farming statuses next to the "Create Position" button, which allows you to open another position in the same pool.
4. Click on the desired position. A dashboard for that position will appear on the right, showing key information about its status and providing options to collect fees, add liquidity, or remove liquidity from the pool.
5. Click "Collect fees" to withdraw earned fees—this is your passive income for providing liquidity to the pool.
6. You now need to approve the operation on the blockchain via your Web3 wallet.
7. If all conditions for the operation align with market conditions, the transaction will be executed. This usually takes no more than a minute, but the time may vary depending on market activity and blockchain conditions.
8. You can check the status of your transaction at any time using specialized blockchain explorers, such as Polygonscan (https://polygonscan.com) or in the History tab in the top-right corner.
Adding Liquidity
1. Go to the "Pools" tab.
2. Find your position and select the "Add Liquidity" option.
2. Find your position and select the "Add Liquidity" option.

3. Enter the number of tokens you want to add to the pool. Liquidity can only be added in two tokens simultaneously and within the same price range as your initial liquidity.
4. Approve the operation for the selected tokens to allow the exchange to use them
5. Click "Approve"
6. Confirm the operation on the blockchain
7. Once approved, the "Add Liquidity" button will become available. Click it.
8. Confirm the operation on the blockchain
9. If all conditions align with market conditions, the transaction will be executed. This usually takes no more than a minute, but the time may vary depending on market activity and blockchain conditions.
10. You can check the status of your transaction at any time using specialized blockchain explorers, such as Polygonscan (https://polygonscan.com) or in the History tab in the top-right corner.
Remember that every action on HoliDEX is performed using blockchain technology. Each operation can only be executed with your approval and can be verified at any time on the POL blockchain.
When performing operations for the first time, permission is requested to use a specific token. This blockchain transaction is called Approve. For this reason, ensure that you have completed the necessary transaction—sometimes one or two Approve steps may be required depending on the operation.
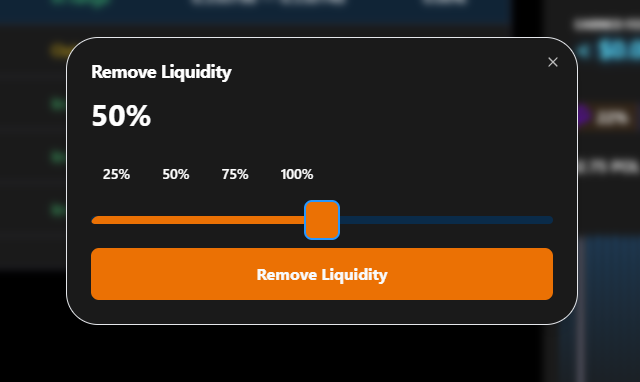
Removing Liquidity
1. Go to the "Pools" tab.
2. Find your position and select the "Remove Liquidity" option.
3. Specify the percentage of your position you want to remove.
4. Click "Remove Liquidity".
2. Find your position and select the "Remove Liquidity" option.
3. Specify the percentage of your position you want to remove.
4. Click "Remove Liquidity".
5. Confirm the operation on the blockchain via your Web3 wallet.
6. If all conditions for removing liquidity (closing the position) align with market conditions, the transaction will be executed. This usually takes no more than a minute, but the time may vary depending on market activity and blockchain conditions.
7. You can check the status of your transaction at any time using specialized blockchain explorers, such as Polygonscan (https://polygonscan.com) or in the History tab in the top-right corner.